
WhatIWore: Now that I have a good idea for the color palette and overall feel for our baby’s nursery, I’m excited to start in on DIY projects for the room. The starting point for it all was the rainbow triangle quilt I recently made as the main focal point and pop of color.
I plan on doing some wall art, making a pillow to match the quilt and today, I’m updating a very inexpensive little wastepaper bin to match the colors and triangles of my quilt. I have a kind of bad habit of just hanging plastic bags on the back of my upstairs doors (nursery, closet, master bedroom) and using them to collect the recycling instead of proper trash cans. This leads to the two bins I do have (in the bathroom and my office) being over filled (and thus resorting back to the plastic bags). If there was ever a time to work on organization and getting this house in gear, it’s now!
So! Let’s get moving with this cute little craft!! Here’s what I’m using:

SUPPLIES
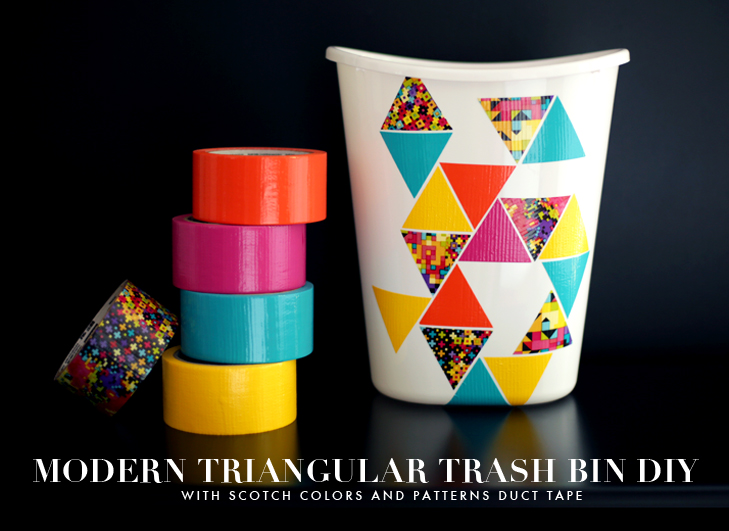
- Small Plastic Trash Bin (I found mine for $1!)
- Assortment of Scotch® Duct Tape (For the pattern I used ‘Pattern Crazy’ and for solids I had Hot Pink, Sunshine Yellow, Tangerine Orange and Blue Turquoise. )
- Self Healing Cutting Mat
- Ruler (with angle marks)
- Sharp Utility Knife (use with caution!)
The last time I played with duct tape I realized it was easiest to cut it using a self healing mat – it stayed in place while I cut it but easily peeled off when I was ready to get sticky. I’ll be using that same technique today.
Start by unrolling some of your tape and placing it along a straight line on your mat.

Next, we’ll want to cut equilateral triangles, which all have 60 degree corners. I’ll do this by laying my 60 degree mark along the bottom edge of the tape and making my first cut along the straight edge of the ruler here. Now I’ll flip my ruler to the top edge of the tape and complete the second cut! This leaves me with a perfect equal sized triangle and I’ve also made the first cut for my second triangle.

Continue in this manner until you’ve created enough triangle ‘stickers’ per color and pattern you’ve picked for your project.
That was the hardest part! Now onto the fun stuff! Let’s get stickin’! Instead of completely filling my background space with triangles, I decided to let a little of the white show through, so I created little clusters of triangles. I wanted to focus on my main nursery pop colors (yellow and teal) and add in accents of the pattern tape (which actually looks very similar to the quilt!) and bits of orange and pink. Note: duct tape sticks to itself easily and won’t come undone, so keep a little distance between all of your tape stickers. They’ll peel up from the cutting mat easily (and I even repositioned a few of mine on the plastic bin).

Once your triangle is in it’s final position, press down firmly around the edges. This will create a strong bond and you shouldn’t see any peeling!

Continue around all sides of your bin until the pattern is complete! If you’re extra patient you could cut out hexagons, multiple sized triangles or even make a cool mosaic with random shapes! You can follow Scotch® Duct Tape on their website, Pinterest, facebook and twitter accounts.


SOURCE: What I Wore – Read entire story here.